Strigo Orientation
User Interface Overview
-
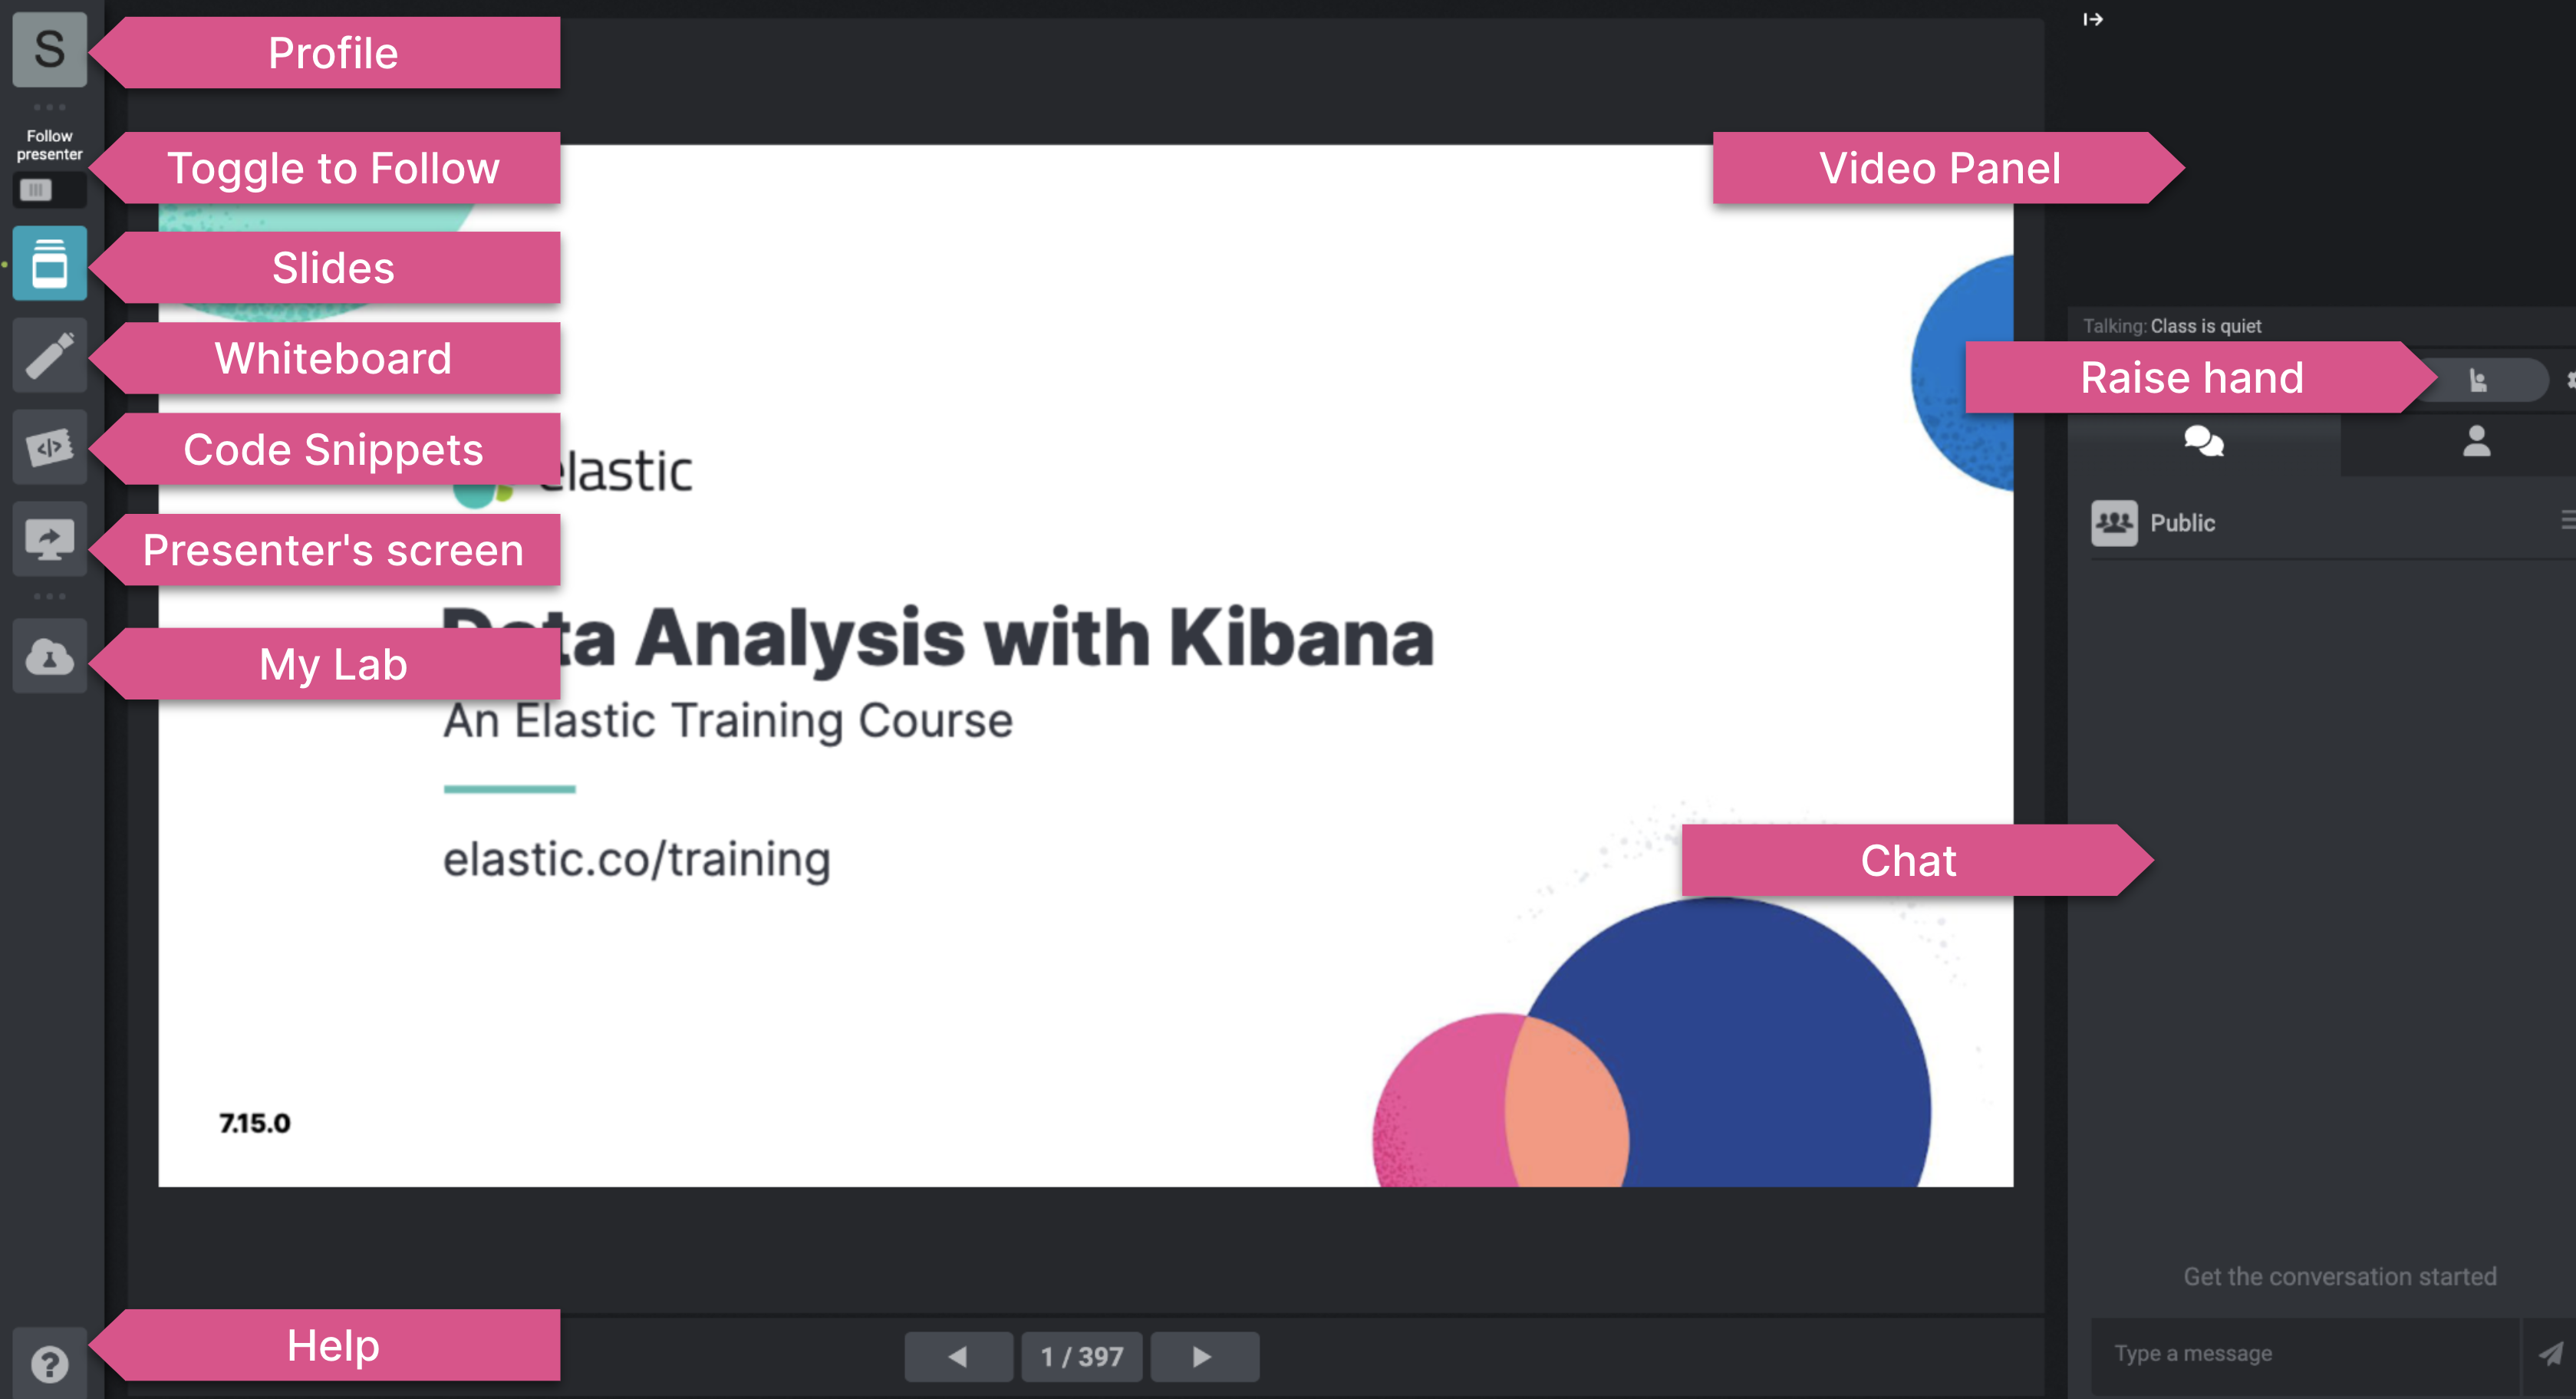
Profile - The profile represents how the instructor and other students see you in the classroom environment, you can change your display name and picture.
-
Toggle to Follow - "Follow Presenter" toggle to sync with the instructor's presentation.
-
Slides - Presentation with selectable text and clickable links. You can follow the instructor or browse the slides at your own pace.
-
Whiteboard - A board where the instructor can draw and share textual information.
-
Code Snippets - Code snippets are pieces of code that the instructor can share. You can always view them and use during lab time.
-
Presenter's Screen - View the instructor's lab, full desktop screen or specific applications.
-
My Lab - Hands on practice lab. The lab comes equipped with a terminal and a code editor connected to a cloud server.
-
Help - Click to access available information of the Virtual Classroom.
-
Video Panel - The video stream source is dynamic and depends on the instructor's configuration. It can be the instructor's video feed, a student who asked to speak or a split feed while in a one on one session.
-
Chat - The built-in chat client supports both private and public chat rooms. Use it to communicate with the instructor and other students.
-
Raise hand - Let the instructors know you need help.
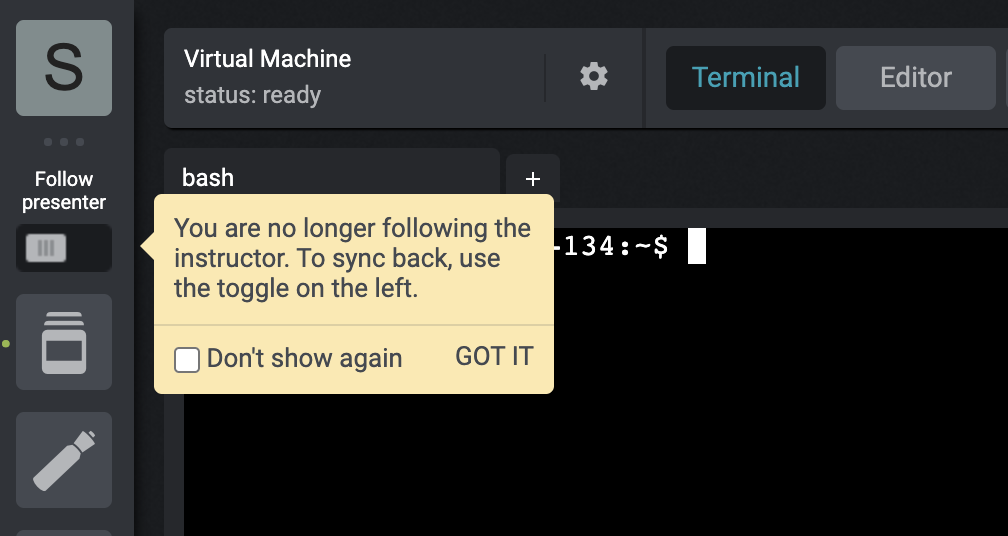
Note:
When you are not currently following the instructor's presentation (this can happen when you change to another area of the course), a sign will be displayed. To revert back to following the presentation, just toggle the switch!
Chat Tips
-
Both public and private chat is available in the virtual classroom. Start a chat or view messages with the following steps:
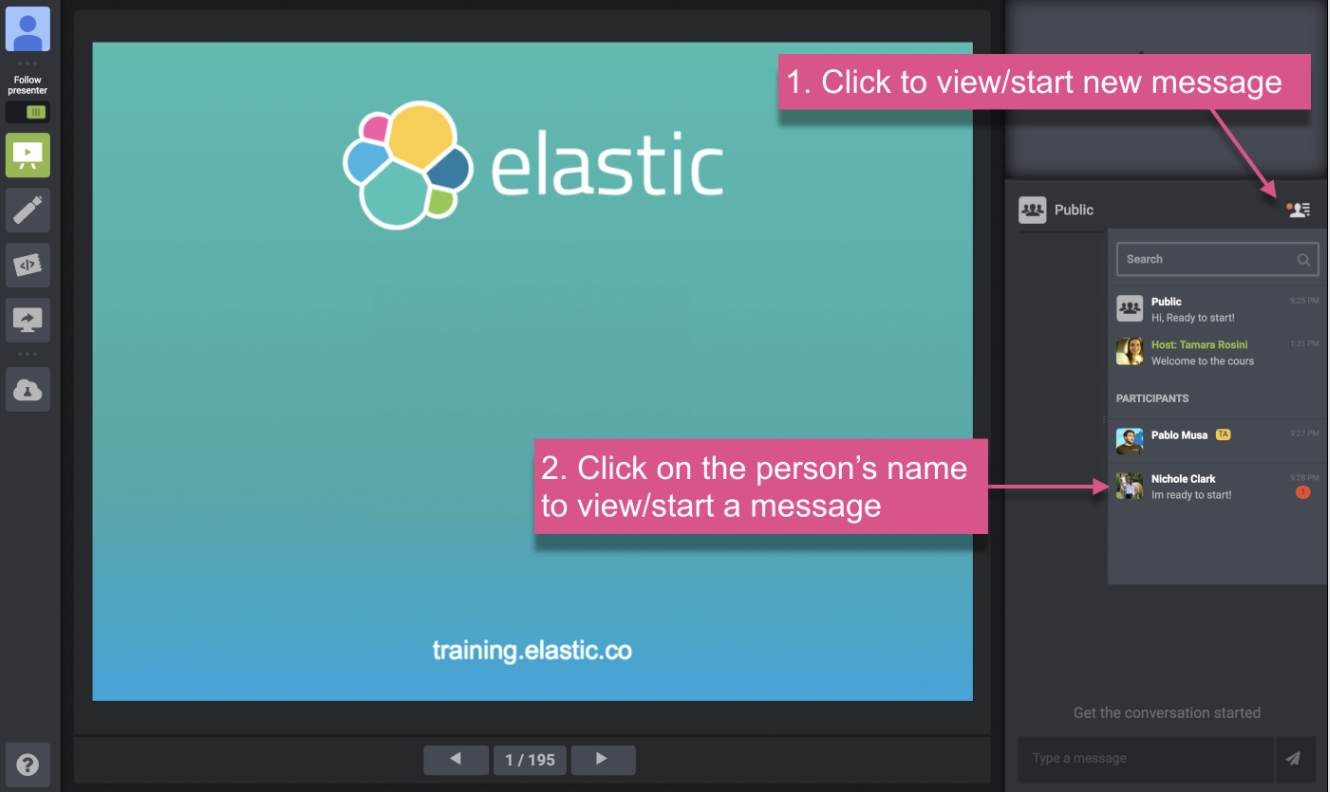
- Click on the icon of a person, located on the top right under the video panel
- Click on "Public" for public chat or on the name of the person
-
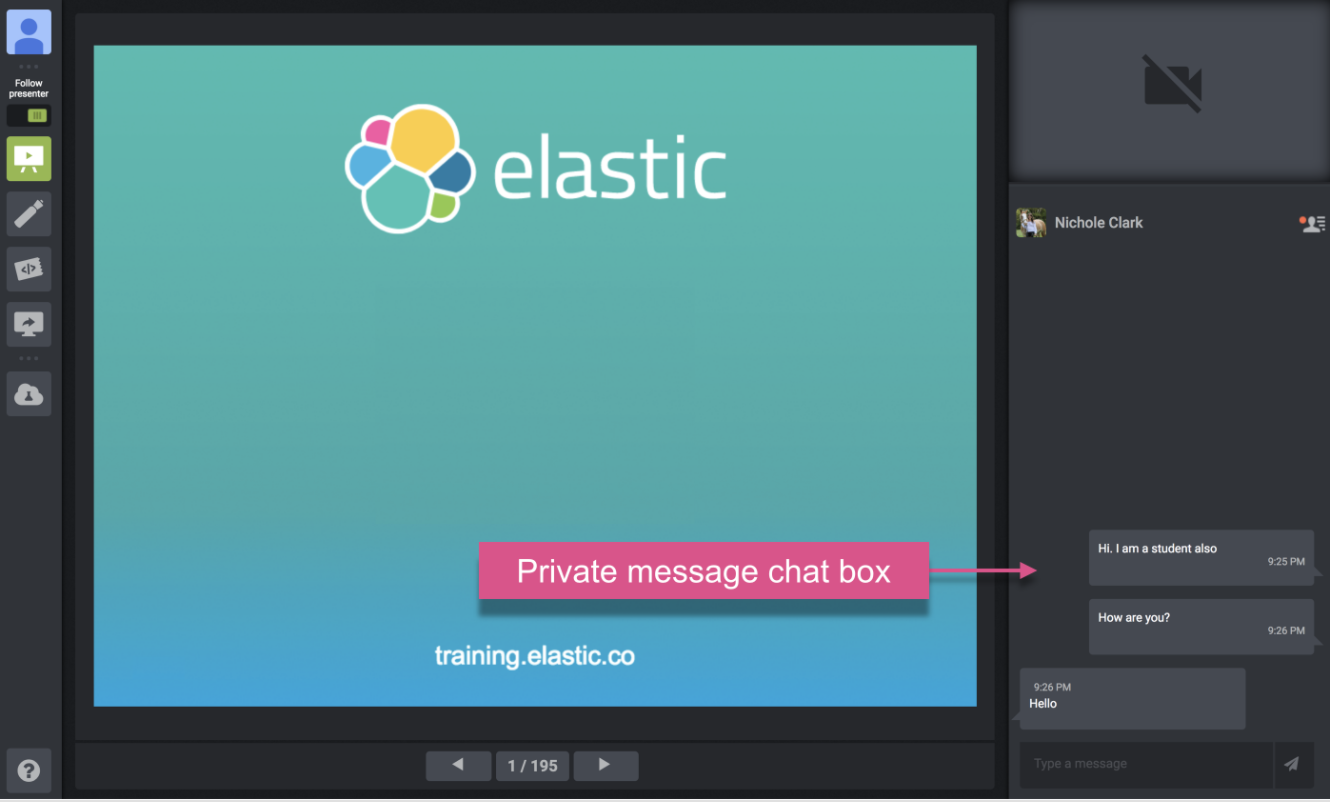
When you are in the private chat, the name of the person will show in the top left of the chat box.
-
Let's talk classroom (public) chat best practices. Our instructors often prompt students for feedback. For example, they may ask the class to enter one of the following characters to engage with everyone:
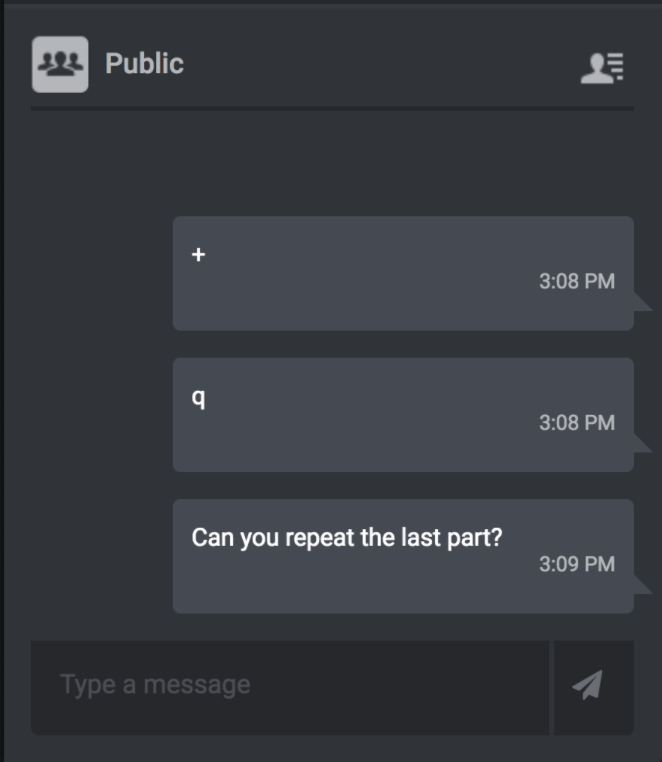
- + - Indicate that you are tracking / agreeing with your instructor
- q - Type a "
q" before a question to indicate you have a question
Lab Environment
The your virtual environment for labs is built on Ubuntu 20.04 Linux virtual machine.
Initial Access
- Click on the "My Lab" button

Instructor Help
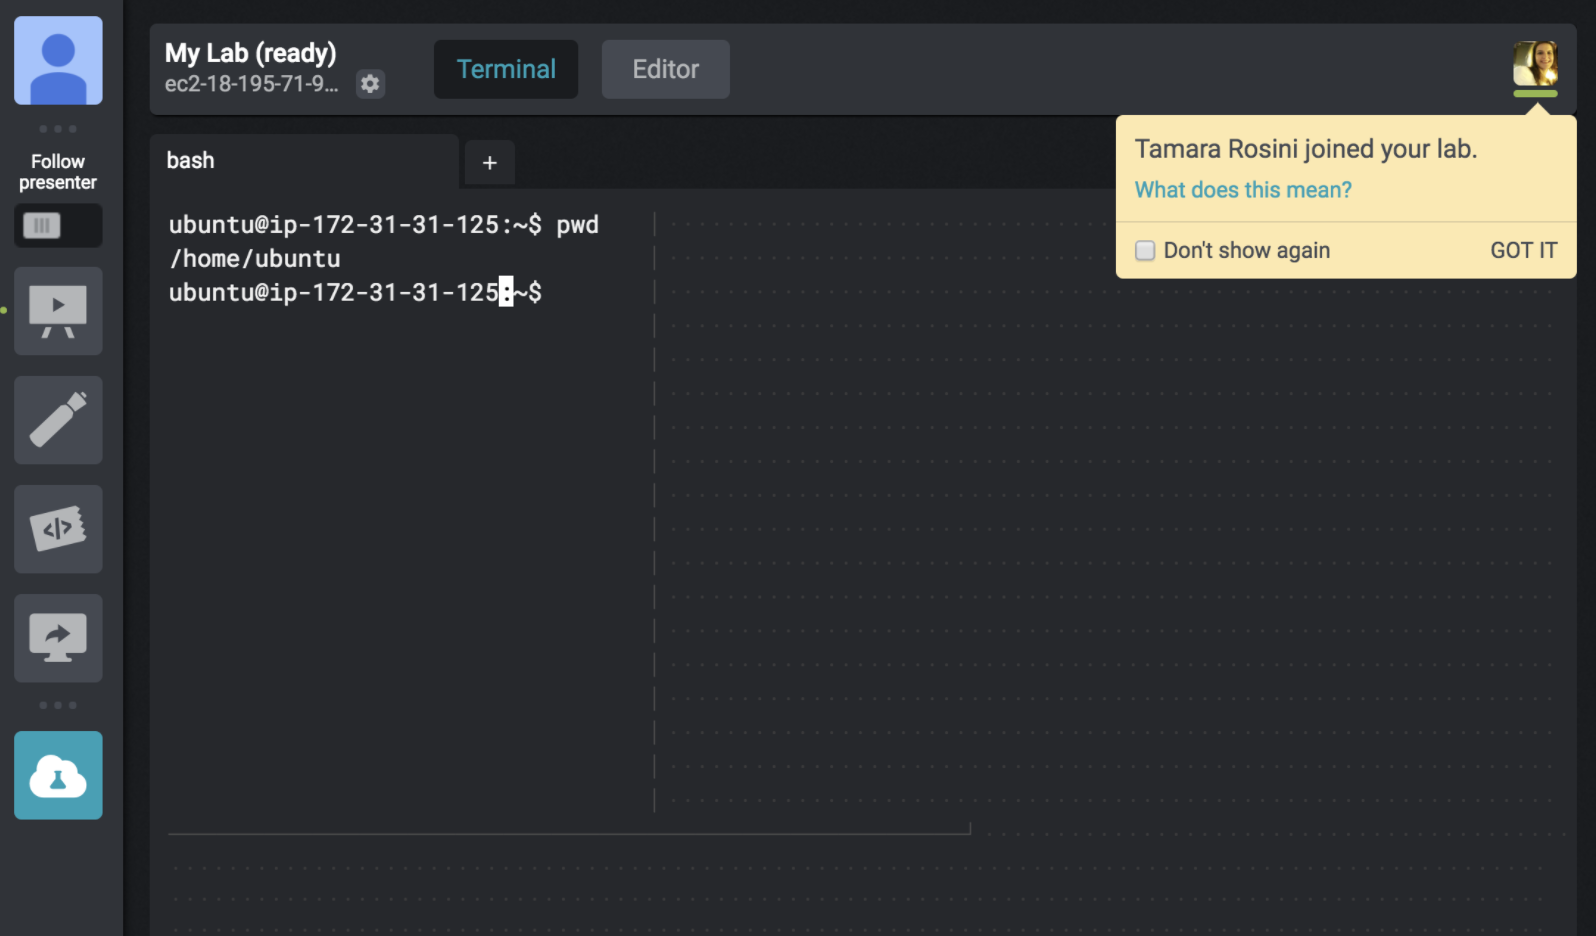
In the event any assistance is needed during the course, you can request assistance and work side by side with an instructor. When an instructor is connected to your lab session, you will see the following sign:
Home Directory
Your files are located under your home directory or "~". You can easily change back to your "home" at any time by executing the command "cd" in the terminal.

Opening Kibana
- Open the Lab Environment.
- Hover with your cursor above the "Kibana" button.
- A small box with arrow icon will appear in the top right of the button. Click on this icon to open Kibana in a new tab.

Get the public IP address of the Lab environment
- Open the Lab Environment.
- Click on the gear icon above the bash terminal
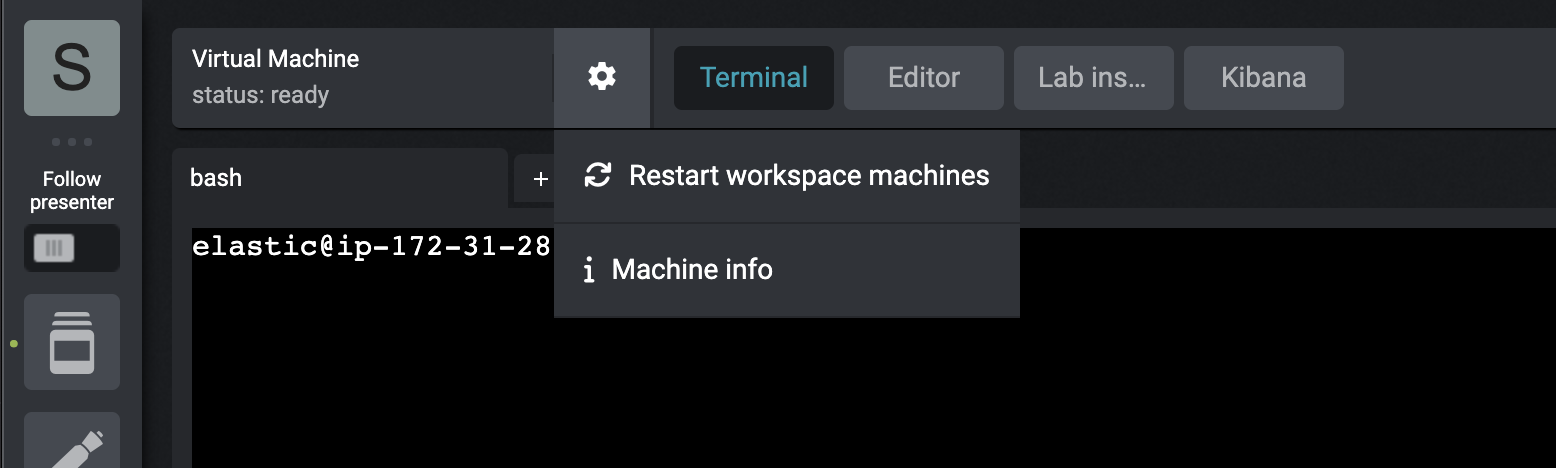
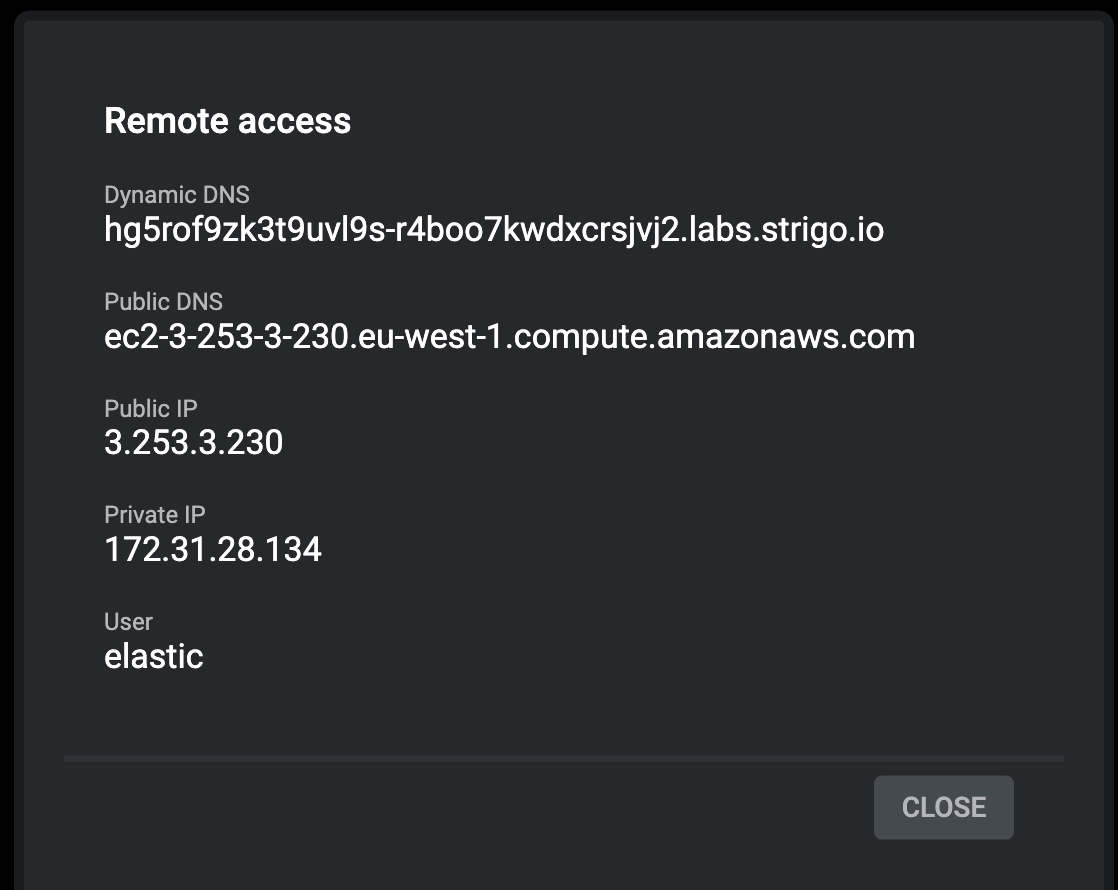
- It opens pop-up with the private and public IPs ETC
Note:
To verify you could run curl -XGET https://localhost:9200 -k -u training:nonprodpwd. If that works, replace localhost with the IP address
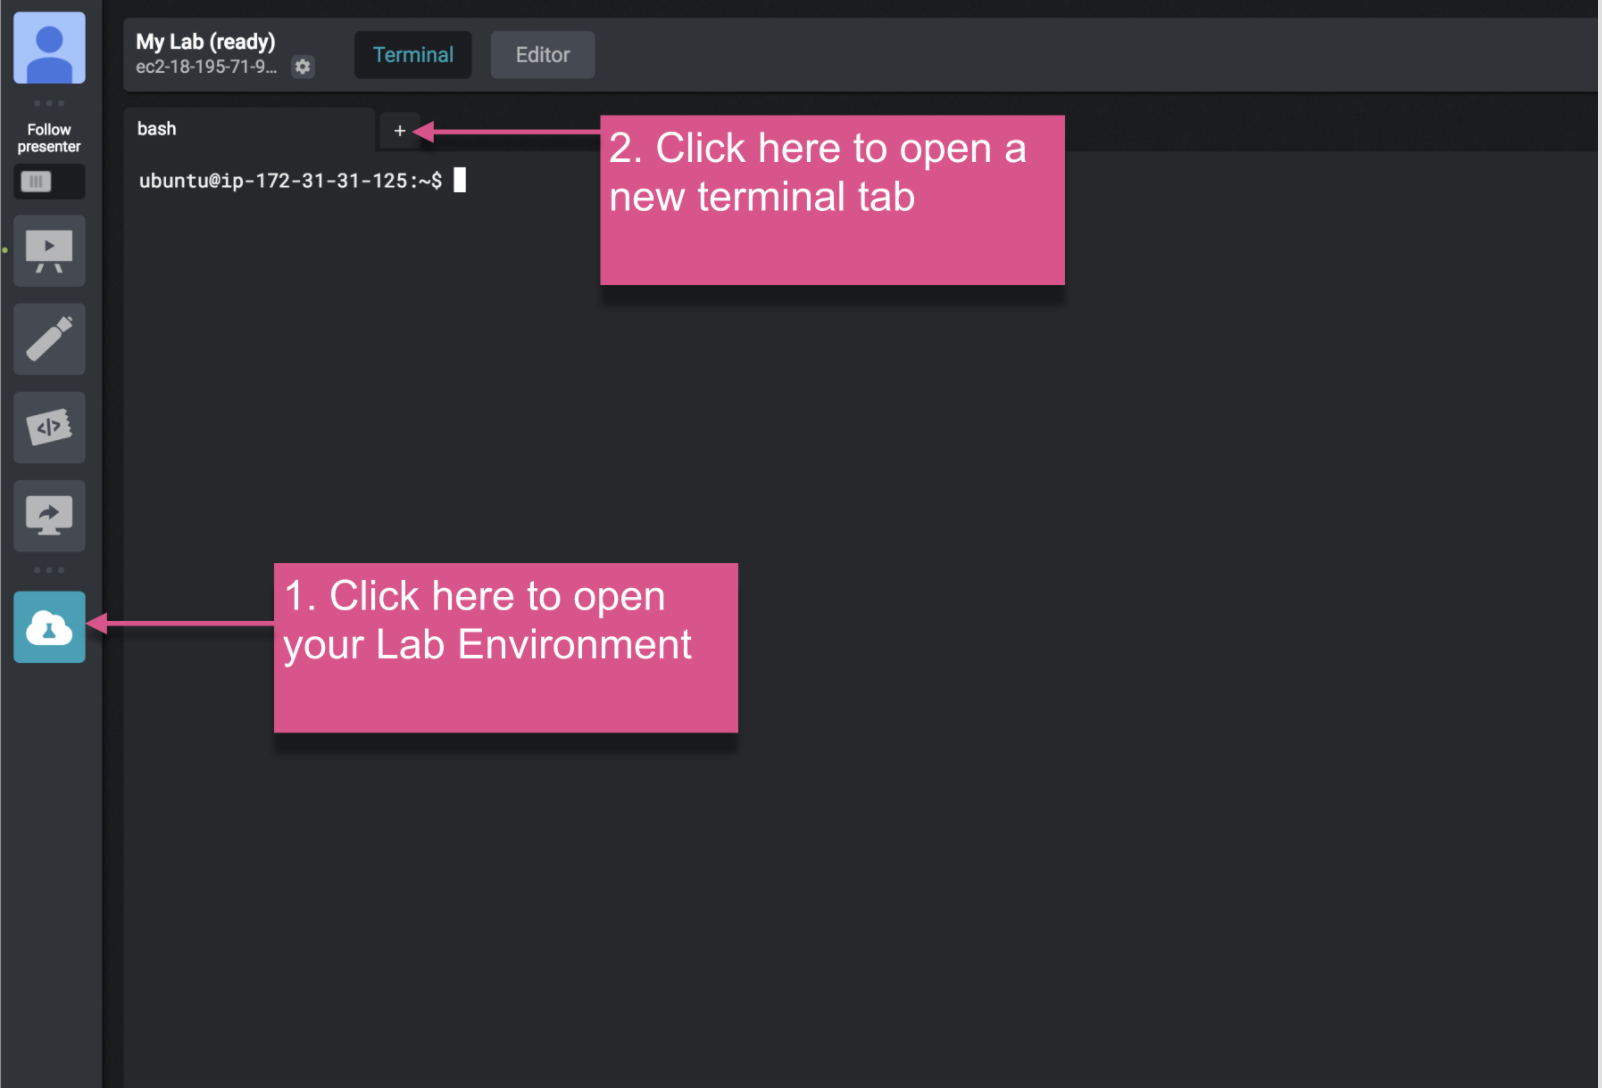
New Terminal Tabs
- Click on the "My Lab" button.
- Click on "+" sign.
File Editing
You can use standard editors like "nano" and "vim" within the provided terminal to edit files.
But an embedded file editor is also provided within the Strigo Virtual Classroom.
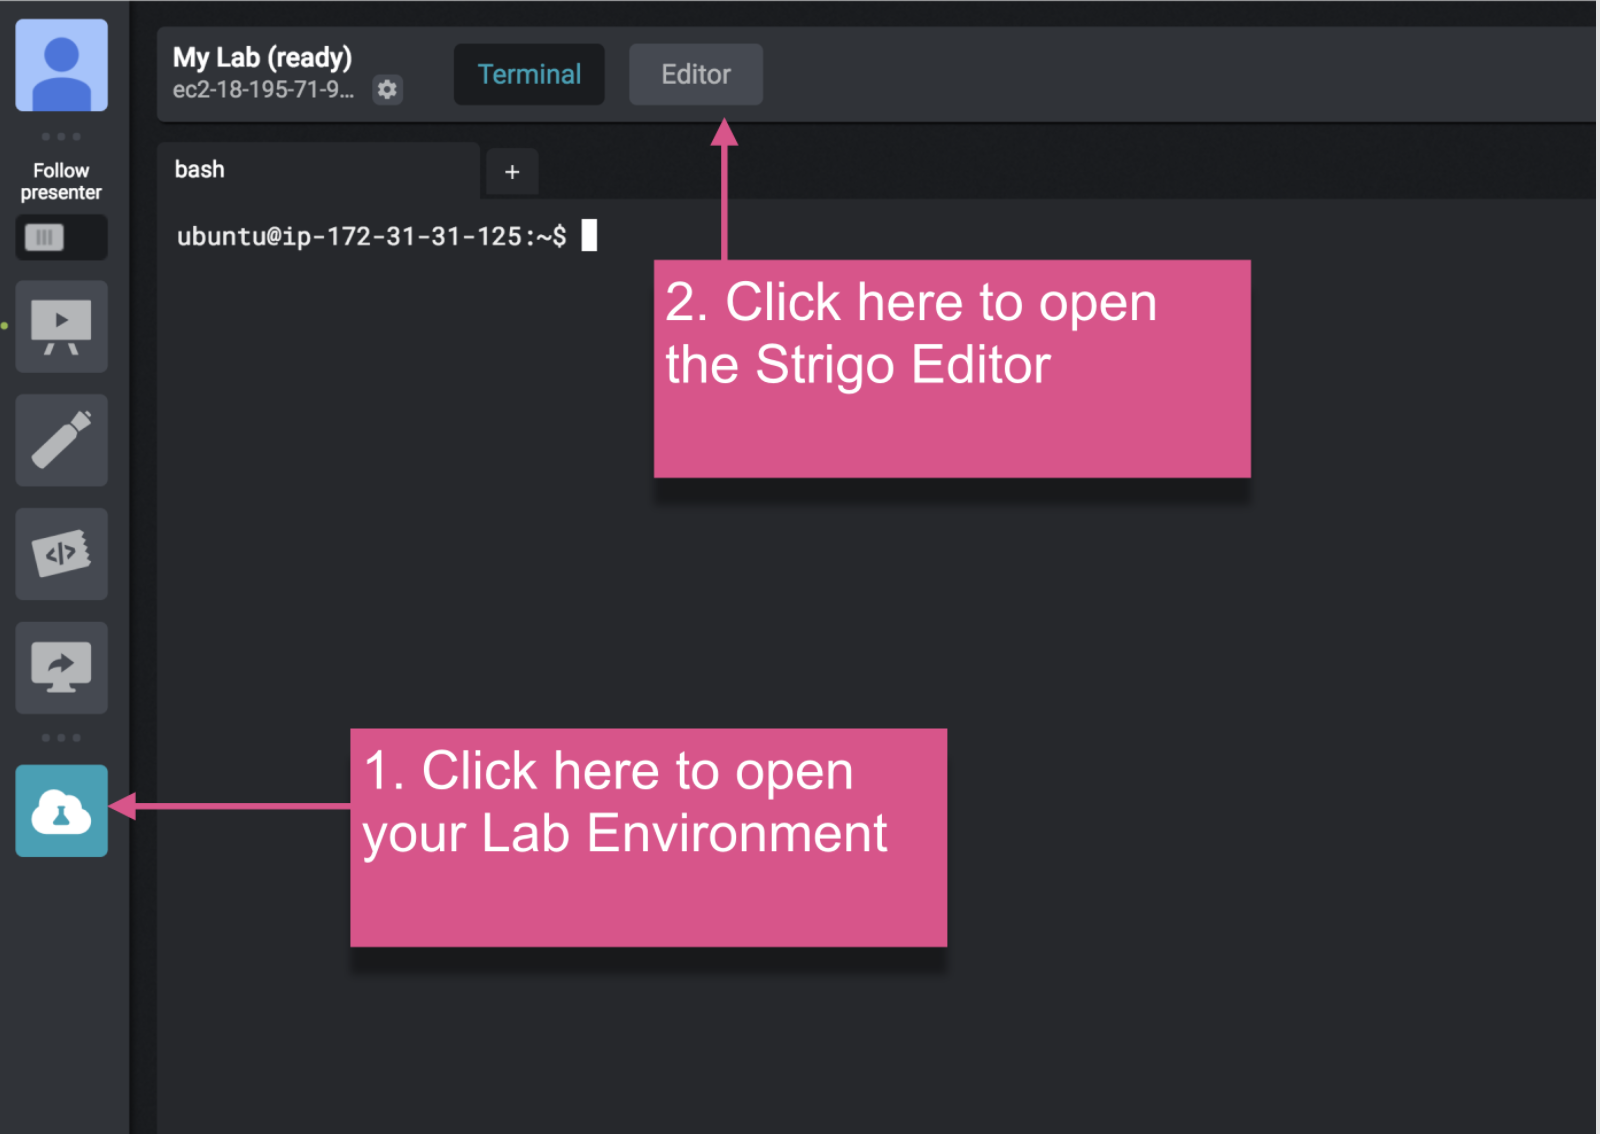
Opening the Editor
- Click on the "My Lab" button.
- Click on "Editor" button, located in the top of the page.
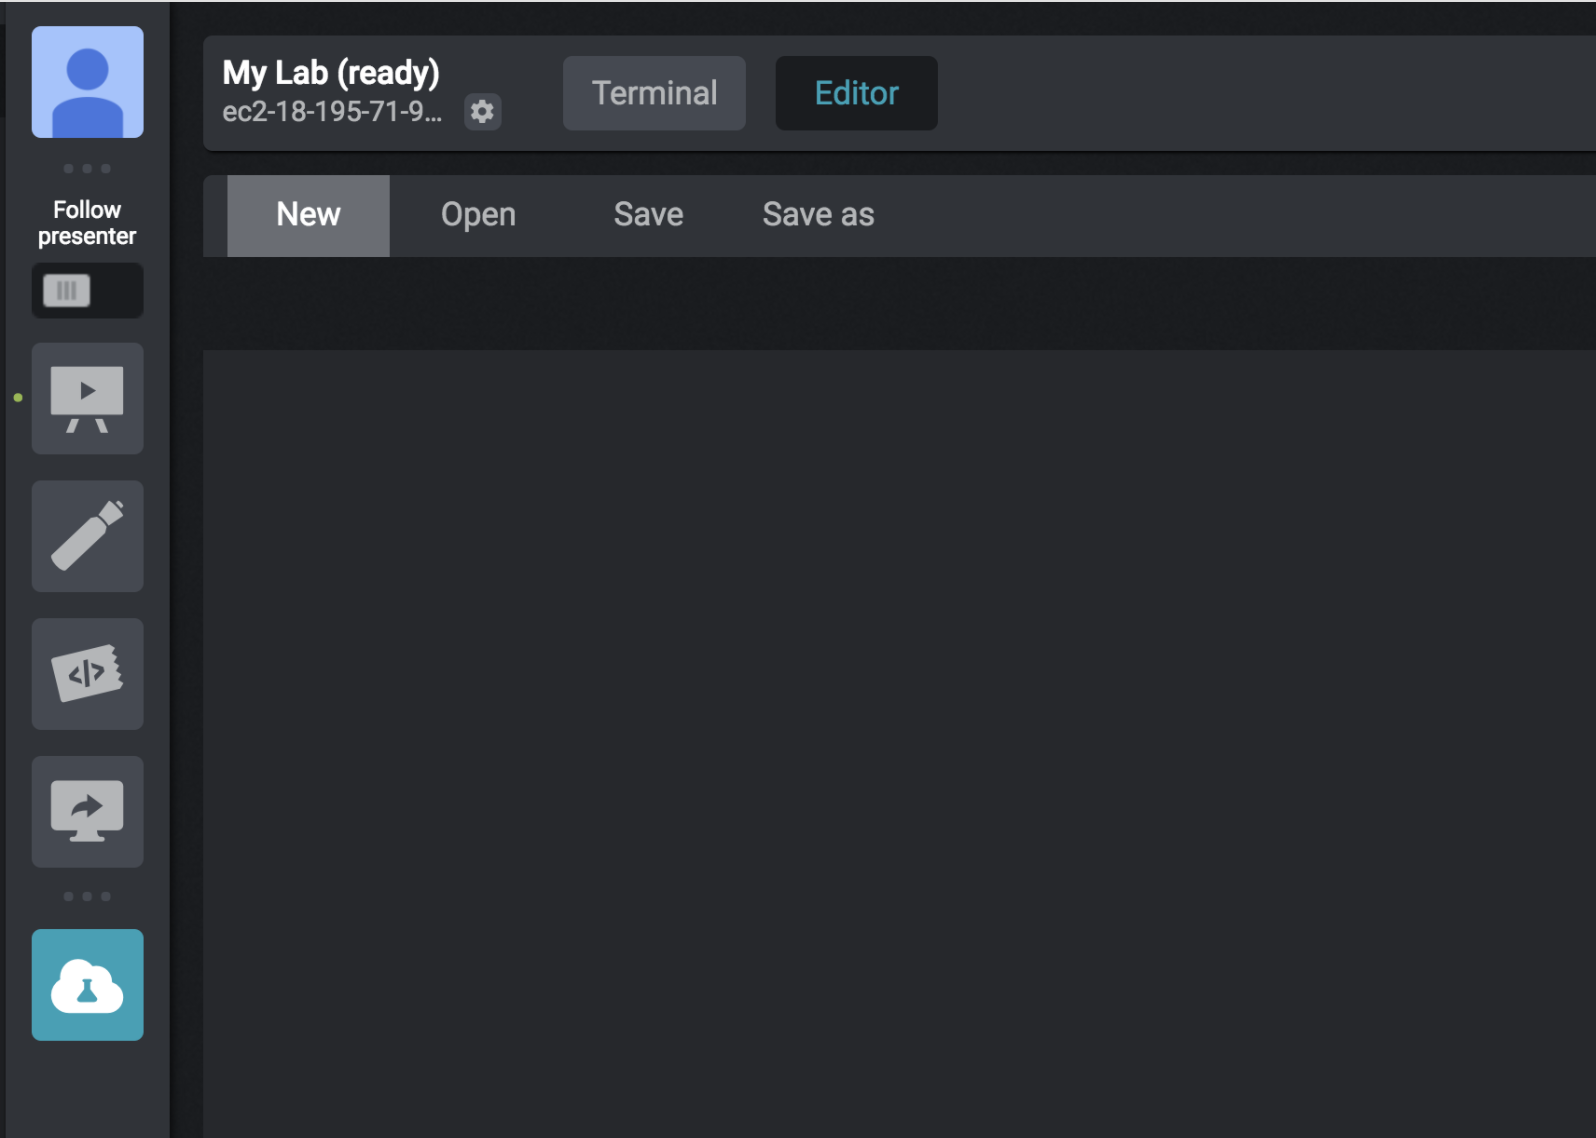
Editor UI
- New - Open a new tab with a file.
- Open - Open a file (default directory is the root).
- Save - Save the file.
- Save as - Save the current file with a new name/location.
Saving a File
After clicking "Save" (located at the top), a dialog will open:
- Select the directory where the file will be saved (default directory is the root).
- Change the file name and the extension.
- Click on "Save".
